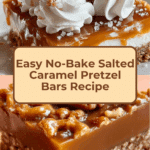
Caramel Pretzel Bars for Sweet Cravings Recipe
If you have a sweet tooth with a salty twist, these Caramel Pretzel Bars for Sweet Cravings are about to become your new obsession. Imagine a crunchy pretzel crust perfectly balanced with luscious salted caramel, all topped with a dreamy whipped cream layer that melts in your mouth. It’s quick, no-bake, and utterly irresistible—everything needed to satisfy those sugar cravings while delivering a delightful texture combo that keeps you coming back for more. Trust me, once you try these bars, they’ll be your go-to treat whenever you want something special yet simple to whip up.

Ingredients You’ll Need
These ingredients are simple pantry staples that each play an important role in building up the layers of flavor and texture that make Caramel Pretzel Bars for Sweet Cravings so special. From the salty crunch of pretzels to the silky whipped cream topping, every component is essential for that perfect bite.
- 2 cups pretzel crumbs: Crushed pretzels provide the salty, crunchy base and help form the crust.
- 1/2 cup unsalted butter, melted: Binds the pretzel crumbs together and adds rich flavor to the crust.
- 1/4 cup granulated sugar: Adds a touch of sweetness to balance the salty pretzels in the crust.
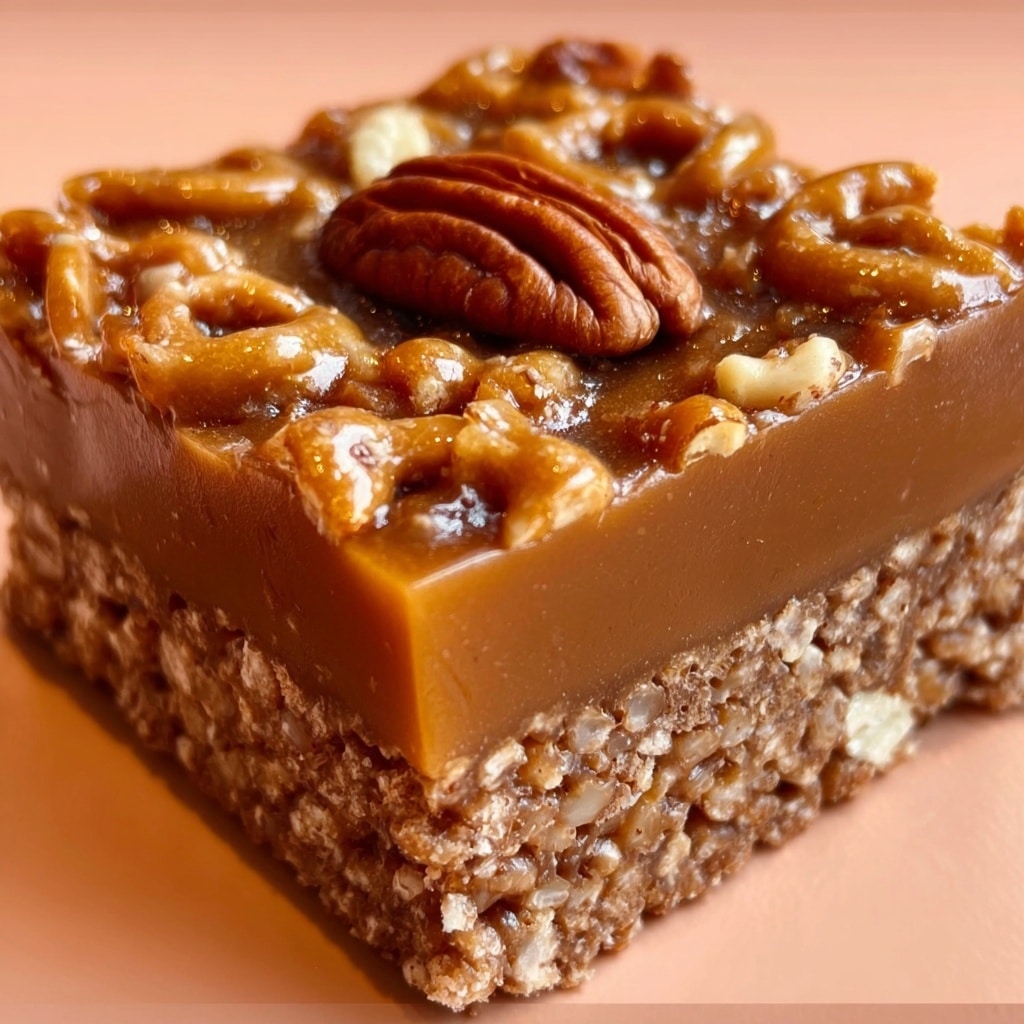
- 1 cup caramel sauce: Either store-bought or homemade, this layer brings that luscious, gooey sweetness.
- 1/2 teaspoon sea salt: Enhances the caramel and cuts through the sweetness perfectly.
- 1 cup heavy cream: Whipped to create the creamy topping that’s light and airy.
- 1/2 cup powdered sugar: Sweetens the whipped cream topping without graininess.
- 1 teaspoon vanilla extract: Adds depth and warmth to the whipped cream.
How to Make Caramel Pretzel Bars for Sweet Cravings
Step 1: Prepare the Pretzel Crust
Start by combining the crushed pretzel crumbs, melted butter, and granulated sugar in a medium bowl. Mix everything thoroughly so the crumbs are evenly coated. Then firmly press this mixture into the bottom of a greased 9×9-inch baking dish. This creates a sturdy and flavorful base that’s delightfully crunchy with just the right salty kick.
Step 2: Layer the Caramel
Next comes the star of the show—the caramel layer. Drizzle your caramel sauce evenly over the pretzel crust, spreading with a spatula to cover every inch. Sprinkle sea salt over the caramel to enhance the flavor contrast. This combination of sweet and salted caramel is what makes these bars truly crave-worthy.
Step 3: Make the Creamy Topping
In a large mixing bowl, whip the heavy cream until it reaches soft peaks. Gradually add the powdered sugar and vanilla extract while continuing to whip until stiff peaks form. This fluffy topping brings a dreamlike creaminess that smoothly balances the crunch and gooey caramel underneath.
Step 4: Assemble and Chill
Spread the luscious whipped cream evenly over the caramel layer in your baking dish. Smooth it out gently for a beautiful finish. Cover the entire dish with plastic wrap and pop it in the refrigerator for at least 2 hours. This chilling time allows the layers to set firmly together, making these bars easy to slice and perfect to serve.
Step 5: Slice and Enjoy
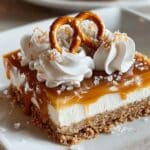
After chilling, remove your Caramel Pretzel Bars for Sweet Cravings from the fridge and cut into squares. Each bite delivers the perfect balance of textures and flavors—a crunchy, salty crust, rich caramel, and a light whipped cream topping that’s simply irresistible. Serve them on a pretty platter and watch how quickly they disappear!
How to Serve Caramel Pretzel Bars for Sweet Cravings
Garnishes
To elevate presentation and add a little extra flair, sprinkle crushed pretzels on top just before serving or drizzle a little extra caramel sauce for an indulgent shine. A light dusting of sea salt flakes on the whipped cream enhances the sweet and salty contrast, making every bite sing.
Side Dishes
These bars shine as a dessert on their own but pair beautifully with a scoop of vanilla ice cream or a cup of strong coffee or espresso. The creamy cold ice cream softens the caramel’s richness, while the bitterness of coffee cuts through the sweetness, creating a perfect end to any meal.
Creative Ways to Present
For parties or gift-giving, consider cutting the bars into mini squares and placing each in a cupcake liner. You can also arrange them on a tiered dessert tray with fresh berries or edible flowers for a vibrant, eye-catching display. These thoughtful touches make your Caramel Pretzel Bars for Sweet Cravings as delightful to look at as they are to eat.
Make Ahead and Storage
Storing Leftovers
Once assembled, store the bars covered tightly in the refrigerator. They stay fresh and delicious for up to 3 days, making them an easy option to prepare ahead of time for any occasion or simply to enjoy later with your afternoon tea.
Freezing
If you want to keep them longer, these bars freeze well. Place them in an airtight container with parchment paper between layers to prevent sticking. Freeze for up to one month and thaw overnight in the fridge before serving, preserving that perfect texture and flavor.
Reheating
Since these bars are best enjoyed chilled and have a whipped cream topping, reheating is not recommended. Instead, allow any frozen bars to thaw completely in the refrigerator to maintain their creamy, fresh-tasting layers.
FAQs
Can I make the caramel sauce from scratch?
Absolutely! Homemade caramel brings a rich, buttery flavor that pairs wonderfully with the salty pretzel crust. Just make sure to cook it carefully to avoid burning, and feel free to adjust the saltiness to your preference.
What kind of pretzels work best for the crust?
Classic salted pretzels are ideal because they provide the perfect salty crunch. You can use pretzel sticks or twists—just give them a good crush until they’re crumb-sized. Avoid flavored or coated pretzels to keep the flavors balanced.
Can I use a different topping instead of whipped cream?
While the whipped cream topping adds lightness and sweetness that complements the other layers, you could try a cream cheese frosting for a tangy twist or even a simple dusting of powdered sugar. Just keep in mind that the whipped cream offers a unique, airy texture that balances the caramel’s richness.
Are these bars gluten-free?
These bars rely on pretzels for the crust, which typically contain gluten. However, if you use gluten-free pretzels, you can make a gluten-free version. Just double-check your caramel and other ingredients for any hidden gluten.
How long should I chill the bars for the best results?
Chilling for at least 2 hours is essential to allow the layers to firm up properly, making slicing easier and enhancing the texture. For even better results, chilling overnight is a great option, especially if preparing ahead.
Final Thoughts
There’s something truly magical about these Caramel Pretzel Bars for Sweet Cravings—the perfect blend of salty, sweet, crunchy, and creamy all in one simple, no-bake treat. Whether you’re making them for a special occasion or just because you deserve a little indulgence, they’re guaranteed to delight your taste buds and warm your heart. Go ahead, give them a try and watch how quickly they become a beloved favorite in your kitchen!
PrintCaramel Pretzel Bars for Sweet Cravings Recipe
These Quick No-Bake Salted Caramel Pretzel Bars are a delightful treat combining a crunchy pretzel crust, rich salted caramel, and a fluffy creamy topping. Perfectly balanced between sweet and salty, they satisfy your sweet cravings without any baking required.
- Prep Time: 15 minutes
- Cook Time: 0 minutes
- Total Time: 2 hours 15 minutes
- Yield: 16 bars 1x
- Category: Dessert
- Method: No-Bake
- Cuisine: American
- Diet: Vegetarian
Ingredients
Pretzel Crust
- 2 cups pretzel crumbs (crushed pretzels)
- 1/2 cup unsalted butter, melted
- 1/4 cup granulated sugar
Caramel Layer
- 1 cup caramel sauce (store-bought or homemade)
- 1/2 teaspoon sea salt
Creamy Topping
- 1 cup heavy cream
- 1/2 cup powdered sugar
- 1 teaspoon vanilla extract
Instructions
- Prepare the Pretzel Crust: In a medium bowl, combine pretzel crumbs, melted butter, and granulated sugar. Mix until well combined. Press the mixture firmly into the bottom of a greased 9×9-inch baking dish to form an even layer.
- Layer the Caramel: Drizzle the caramel sauce over the pretzel crust. Use a spatula to spread it evenly. Sprinkle the sea salt on top of the caramel layer to enhance the flavor.
- Make the Creamy Topping: In a large mixing bowl, whip the heavy cream until soft peaks form. Gradually add powdered sugar and vanilla extract, continuing to whip until stiff peaks form for a smooth, fluffy topping.
- Assemble the Bars: Spread the whipped cream mixture evenly over the caramel layer in the baking dish, smoothing it out to create a uniform top layer.
- Chill: Cover the dish with plastic wrap and refrigerate for at least 2 hours or until the bars are firm and set, allowing the layers to meld perfectly.
- Slice and Serve: Once chilled, remove from the refrigerator. Cut into squares and serve your delightful salted caramel pretzel bars. Enjoy!
Notes
- Use store-bought caramel sauce for a quick version or homemade for a richer taste.
- Make sure to crush pretzels finely for a more cohesive crust.
- Adjust the sea salt amount based on your preferred level of saltiness.
- These bars store well in the refrigerator for up to 3 days.
- For a gluten-free version, use gluten-free pretzels.
Nutrition
- Serving Size: 1 bar (assuming 16 bars)
- Calories: 250
- Sugar: 18g
- Sodium: 180mg
- Fat: 16g
- Saturated Fat: 9g
- Unsaturated Fat: 6g
- Trans Fat: 0g
- Carbohydrates: 24g
- Fiber: 1g
- Protein: 2g
- Cholesterol: 35mg
Keywords: no bake dessert, salted caramel bars, pretzel crust dessert, quick sweet treat, easy caramel bars